Wall moulding represents one of the most effective ways to add architectural character and sophistication to any space. With the advent of ready-made moulding kits, this design element has become accessible to homeowners of all skill levels. However, with numerous styles, materials, and applications available, selecting the perfect kit requires careful consideration. This comprehensive guide will help you navigate the selection process to find the ideal wall moulding kit for your project.
Understanding Moulding Materials
The foundation of your project begins with material selection, as each option offers distinct advantages:
Polyurethane
-
Excellent for intricate, ornate designs
-
Lightweight and easy to install
-
Moisture-resistant, suitable for bathrooms and kitchens
-
Typically comes pre-primed and ready to paint
-
More expensive than MDF options
MDF (Medium-Density Fiberboard)
-
Most common and cost-effective choice
-
Perfect for clean, painted finishes
-
Smooth surface accepts paint beautifully
-
Heavier than polyurethane
-
Should be used in dry areas only
PVC and Vinyl
-
Ideal for high-moisture areas
-
Won’t warp or rot
-
Easy to clean and maintain
-
Often features interlocking systems for simple installation
Assessing Your Space and Style
Before selecting a kit, evaluate your room’s characteristics:
Ceiling Height
-
Rooms with standard 8-foot ceilings benefit from simpler profiles
-
Taller ceilings can accommodate more substantial, elaborate mouldings
-
Vertical designs can enhance the perception of height
Room Size and Proportion
-
Larger rooms handle bold, complex patterns
-
Smaller spaces work better with simpler, more refined profiles
-
Consider how moulding will affect the room’s visual balance
Existing Architectural Features
-
Match the scale of existing features like doors and windows
-
Consider complementing rather than competing with built-in elements
-
Ensure new moulding enhances the room’s overall flow
Popular Moulding Styles and Applications
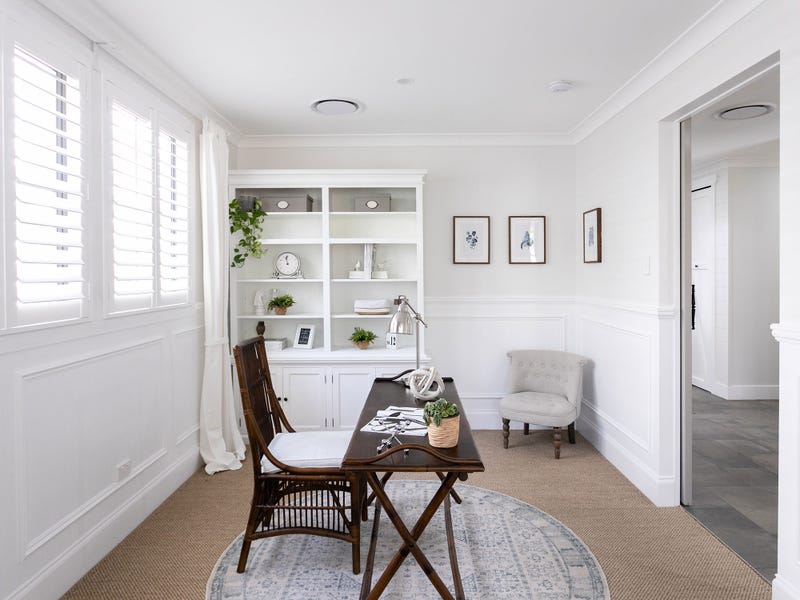
Classic Picture Frame Moulding
-
Creates grid-like patterns on walls
-
Ideal for traditional and transitional spaces
-
Works well in dining rooms, living areas, and entryways
-
Can be installed as full-wall coverage or as a chair-rail height treatment
Wainscoting Kits
-
Protects lower walls while adding elegance
-
Perfect for hallways, dining rooms, and bathrooms
-
Available in raised panel, flat panel, and beadboard styles
-
Typically covers the lower third to half of the wall
Chair Rail Moulding
-
Installed approximately 36 inches from the floor
-
Protects walls from chair damage in dining rooms
-
Creates visual separation for two-tone paint treatments
-
Can be combined with other moulding types for layered effects
Crown Moulding
-
Bridges the gap between walls and ceilings
-
Adds finished, polished appearance to any room
-
Size should be proportional to room dimensions
-
More elaborate profiles suit formal spaces
Practical Considerations
Installation Requirements
-
Assess your DIY skill level honestly
-
Basic kits require minimal tools: level, saw, adhesive
-
Complex installations might benefit from professional help
-
Consider time commitment for preparation and finishing
Budget Factors
-
Material costs vary significantly
-
Factor in additional expenses for adhesive, finishing supplies, and tools
-
Complex patterns may require more material due to waste from cutting
-
Remember that painting costs should be included in your budget
Maintenance and Durability
-
Consider the room’s traffic and use
-
Families with children might prefer more durable materials
-
High-humidity areas require moisture-resistant options
-
Think about long-term cleaning and upkeep
Implementation Tips
Sample Testing
-
Always order samples before committing to a full installation
-
Test how materials take paint and finish
-
Hold samples in your space to assess scale and proportion
Layout Planning
-
Create a detailed plan before beginning installation
-
Use painter’s tape to mock up designs on your walls
-
Ensure patterns are symmetrical and properly scaled
-
Account for electrical outlets, switches, and other obstructions
Finishing Strategy
-
Proper priming is essential, especially for MDF
-
Use high-quality caulk to create seamless transitions
-
Consider hiring a professional painter for complex profiles
-
Choose paint finishes that complement your room’s use and style
Selecting the perfect wall moulding kit involves balancing aesthetic preferences with practical considerations. By understanding your space, researching materials, and planning carefully, you can achieve a professional-looking result that enhances your home’s character and value. Remember that the best moulding installation is one that looks like it was always part of your home’s architecture, creating timeless elegance that you’ll enjoy for years to come.